Showing posts with label wood crafts. Show all posts

Tuesday, June 8, 2010

Colors!

Okay so I know I've been moved-in for a couple of weeks now, and have still failed to produce a substantial post. I am a failure.

In fact, I've just been very busy. Being unemployed takes up a surprising amount of time. There's all the sleeping in...followed by catching up the latest episode of the Bachelorette....followed by lunchtime...then I have to shower and get ready for the day...pick up some groceries and leisurely start cooking dinner. So see? No time to blog. NOT. I'm just lazy--and haven't had a lot of access to a car. Can you believe I've only been to Hobby Lobby once in the past month? And that was to buy some cooking spray of all boring things!

Well I vow to make something crafty this week. I'm not sure what it will be yet, but it will be crafty. :)

In the meantime, I have been blog-stalking everyone else:

Make It and Love It.
 I Dig Pinterest
 Casa de Carmelo
Be Different, Act Normal
Umm...colorful furniture? Yes please?!?

Friday, April 2, 2010

Miscellaneous Awesomeness

So if you haven't noticed, there's kind of a theme here at Craft Rookie this week--as I said in an earlier post, I've been a tad obsessed with DIY projects as of late.

So to carry on with this week's grand tradition....

This staircase would be perfection if the stairs were wood instead of carpet...Beautiful! How cute would this be in a baby girl nursery?Umm...that clock? Hello!!!!Easy peasy scrapbook art pictures! Rock on!I'm SO making one of these someday...when I have kids.*Chorus of angels singing* "Ahhhhhh!"Ca-ute!!! Sign me up for a wall with a bunch of plates!

Thursday, February 18, 2010

Adorable Baby Quilts

I'm a little obsessed with this adorable baby quilt from V&Co.
 PS: It KILLS me that her post is called, "I made a couple of quilts." Like she's saying, "I went out and checked the mail." Modest, much?

I'm generally quite thrifty (and deep down, sorta cheap), but quality custom-made quilts are one thing I'd pay a lot for...and have before.  There is just something so wonderful about a bright, cozy, heavy quilt.
 

Friday, January 8, 2010

Love...True Love!

I love these colors, that great hutch, the beadboard walls, and that awesome dark flooring!

Thursday, January 7, 2010

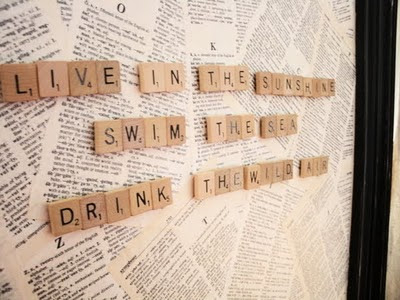
Magnet Board and Scrabble Letters

Ummm...can I just say, "Cute!"?

Something about Scrabble letters lately is so fun. :) I might have to check out the DI and see if anyone was dumb awesome enough to donate a game so I can make this magnet board!

Thanks Kari at U-Create for featuring this great idea from The Twice Remembered. :)

Monday, December 21, 2009

Homemade Coasters

Let's talk about coasters. :)
You might remember from a couple of months ago when I posted about these super-cute coasters from Becky Higgins.
Well, my sister is moving into a new apartment next month, and she bought new furniture for her living room. Brand spanking new furniture? Talk about needing coasters! :) So I made some for her for Christmas.

I bought the wood squares at Hobby Lobby. I think they were 3/$1.00 if my memory serves. I also bought chocolate brown toll paint. First thing's first, I painted the edges and the under-side.
Then I cut squares of scrapbook paper to the right size.
Next, I mod-podged them onto the wood squares. **NOTE: I used the thicker kind of scrapbook paper (more of a card-stock weight) and it kept soaking the mod podge up and taking forever to dry, because it was kind of spongey....so I would recommend NOT using the more porous card-stock paper when modpodging. Stick to the normal paper-weight scrapbook paper.**I think I added about 4 layers of mod podge over about a 6-day period of time. {Like I said, it was taking FOREVER to dry!} Once the mod podge had dried completely on all sides, I shellacked the heck out of them. The reason I shellacked is because mod podge has the tendency to stay a little tacky. For most projects, that's not a big deal, but I wanted my sister to be able to stack these coasters on top of one another, and I didn't want them to get stuck together and then peel when she tried to pull them apart.

The shallac helped with the tackiness--they are still a BIT sticky, but hopefully it won't harm them.
If you are still looking for a quick gift idea before Christmas, these might be something to try! If you don't use the uber-thick paper, you could have this project done and dried within a couple of days.

Tuesday, December 15, 2009

Bow Holder Tutorial

I apologize for my severe lack of blog posts the past few weeks--and especially for my lack of tutorials. :) Well, here's one of the things I've been working on. My little sister is in beauty school, and she has short-ish hair, but likes to wear headbands, flowers, etc. to jazz up her look. So I made her flower clips and a bow holder to hang them on for her Christmas gift.

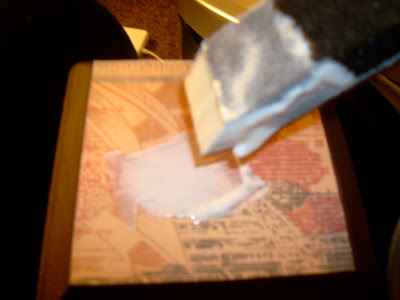
I used this old chess board that I found at the D.I. for a couple of bucks as my base for the bow holder.I mod podged black-and-white checked paper onto the front and painted the frame with blue toll paint. Then I chose some coordinating ribbon for the bows to attach to. (Chicken wire is a great option for bow hangers--but good luck finding any! All the hardware stores I went to only sold chicken wire by the roll-and I wasn't paying $30.00 for a roll of chicken wire when I only needed 2 feet of it.)
I flipped the frame upside-down and used my trusty staple gun to attach the ribbon securely.
As you know, I'm not a measurer. I prefer to just eyeball things (mostly because I'm lazy). So I didn't measure where I was putting my ribbon, I just stapled it where I thought it looked about even.
I put a few staples in each ribbon just to keep it tight and folded the end of the ribbon underneath so it wouldn't have frayed pieces poking out as badly.
I decided to put the ribbon in a checkered pattern. You could also do it diagnally, or just in stripes. I'm glad I did the checked look though, because I think the bows won't slide down the ribbon as badly as if I just had straight lines.
Then attach your flowers
And hang it on the wall (or wrap it up to give as a gift like this one will be).
Let me know what you think--and if you have questions.

Friday, September 25, 2009

Homemade Christmas Ornaments on a Budget

Last year we had a little mini-tree because we didn't have room in our small apartment for a big one.

But this year, we have more room, so we are planning on getting a full-size tree. The only problem? We only have little mini-ornaments...and I have a feeling they'd look pretty wierd on a big one. :) So it was time to start making ornaments for our full-size tree.

Since we don't have a lot of storage space (or a lot of money) we didn't want to invest in the bulbs that take up so much room to store (and cost a lot.) So I went to Hobby Lobby and found these great wooden Christmas shapes. They were 4/1.00! I can handle that. :)
Then I bought some clearance patterned paper (I think they were trying to get rid of the leftover stuff from last year...but heck, it's all red and green, so it works for me. ;)
I also bought some red and green ribbon to help decorate them.
So first thing's first, I cut out a little bit of paper big enough to cover the first shape. Then I put some mod-podge on the shape, layed the paper on it, and smoothed out the bubbles. (For more detailed instructions on mod-podging, click HERE.)After the mod-podge under the paper has dried, put a layer of mod-podge over the top of it to give it a shiny, glossy, hard cover. Let it dry, then coat it a couple more times until it looks how you want it to.After the mod-podge had dried everywhere, I took a foam brush, and sponged the edges of the shapes with some silver toll paint. I let that dry, and then added embellishments like buttons, ribbons, etc. to each shape.Next I sprayed a layer of glitter over all of them. :) I think it will look cool when the lights on the tree catch the glitter and make the ornaments look sparkly. Tu-duh!Candy CaneBulbTreeStockingPresentReindeerGingerbread ManThese would also make great tags for larger presents. :) Oh, and in case you were wondering, I am going to drill a little hole in the top of each of these and put a hook or ribbon through them so they can hang on the tree. :)

"Can't Get Enough..."