I like making cards, and I rarely get an excuse to make them except for birthdays...so Valentines day seemed like the perfect excuse to make some home-made Valentines to send to my family back in Utah.


Showing posts with label scrapbooking. Show all posts
Wednesday, February 2, 2011
Be Mine, Valentine
Labels:
holidays,
scrapbooking
Wednesday, December 1, 2010
Personalized Christmas Gift Tags
I know I haven't posted anything for awhile. My mom and sister came here to Wisconsin to visit me, so I was enjoying their company for a week, and then after that it was all about playing catch-up with everything else going on in my life.
Even though I haven't been blogging, I have been crafting--specifically, I've been making gift tags. All the presents we are giving to people have been shipped out to Utah, (can you believe how ridiculous the cost is to check a bag at the airport these days?) but I'm going to wrap them when I get there, and these gift tags will be a very easy thing to pack along in my carry-on that will give my gifts a personal touch.


Happy December!
For some more holiday inspiration, check out these other holiday posts on Craft Rookie:
"Can't Get Enough..."
"It's Beginning to Look A Lot Like..."
Even though I haven't been blogging, I have been crafting--specifically, I've been making gift tags. All the presents we are giving to people have been shipped out to Utah, (can you believe how ridiculous the cost is to check a bag at the airport these days?) but I'm going to wrap them when I get there, and these gift tags will be a very easy thing to pack along in my carry-on that will give my gifts a personal touch.


For some more holiday inspiration, check out these other holiday posts on Craft Rookie:
"Can't Get Enough..."
"It's Beginning to Look A Lot Like..."
Labels:
gift ideas,
giveaways,
holidays,
scrapbooking
Wednesday, July 28, 2010
De-Clutter Your Nightstand
Do you have a corner of your house with home decor magazines stacked high? And you can't bear to throw them out because they are stuffed with great ideas that you want to be able to access in the future?
Yep...I did too.
Until I decided to channel my 12-year-old self and make a collage of sorts. I grabbed a normal college-ruled spiral notebook and got to work cutting and taping and labeling.

My little collage notebook isn't beautiful--a lot of the images are cut out crooked or torn from me thinking I could rip them from the magazine....

Some of the writing on the labels are smudged because I was using one of those really inky pens (I hate those pens)....

But all my BHG images (there are a few Pottery Barn catalog images mixed in too) fit into one notebook now, instead of twenty different magazines.


And now I have a photo of every decorating idea I've ever loved from BHG at my fingertips for when we get a real house, and I am not carting around my {very loved} magazines from apartment to apartment while hubbs goes to grad school.
I think it's a little brilliant. :)
Yep...I did too.
Until I decided to channel my 12-year-old self and make a collage of sorts. I grabbed a normal college-ruled spiral notebook and got to work cutting and taping and labeling.
I think it's a little brilliant. :)
Labels:
furniture,
home decor,
scrapbooking
Thursday, May 20, 2010
Pink & Orange Wedding
I promise I'm alive! We arrived safe and sound in Albuquerque this week, and as soon as we get a real internet connection I'll get posting again! In the meantime, here are a few pictures of all the decorations we did for my little sister's wedding last week:
A shot of the whole room before the reception:
We had 20 Chinese lanterns hanging around the room with fishing line so they would look like they were "floating," then attached ribbon to hang down from the bottoms of the lanterns in matching orange and pink colors.
The centerpieces were made of vases with ribbon tied around them, then inside we put pink rocks from Petsmart, goldfish, and some tall flowers. My mom and I sewed the table squares for each centerpiece using fabric and then double-fold bias tape in the opposite color.
We had a table with photos on it. We made the runner for it as well, using fabric, oversized ric-rac, and my Big Shot to create the 3-D flowers.
Sweet Cheeks is kind of the family pet. Long story...but of course she had to be at the wedding. :) My sister and I made her tutu and coordinating leotard and kept Sweet Cheeks' special outfit a secret until the reception. My little sister thought it was pretty cool. ;) Her husband...not so much.
The candy buffet looked awesome and in my opinion was a total success....but we had TONS of leftover candy afterwards....
Hand-made sign-in pages.
We also made the pink polka-dot drop cloth for the cake:
Close-up of the lanterns...and the happy couple, I guess. ;)
A shot of the whole room before the reception:


Labels:
big shot,
candy buffet,
diy,
party favors,
scrapbooking,
simple sewing,
wedding
Tuesday, March 9, 2010
Stampin' Up: "Big Shot"
Well, since I'm poor and couldn't afford to buy the Stampin' Up/Sizzix Big Shot right now (since we are saving for the big move to Albuquerque in a couple of months) a family friend who sells Stampin' Up products offered to trade the big shot with me if I would work on some projects for her. So here is my first project she assigned me (done with the Big Shot of course!)
The only supplies I needed were the Big Shot with the die cut shapes I needed (flowers in this case), fabric, thin batting, spray adhesive, scissors, and ribbon.
The first step is to cut your fabric out into squares and glue them together, sandwiching the batting in the middle.
Then cut off the excess, so that the square has one of each of the layers all over it ( you don't want to make it uneven so that when you cut your shape out the bottom layer is only half there, or whatever....see what I'm saying?)
Cut out all your pieces like this so that they are ready to go.
Next comes the fun part. Choose your shape and lay it flat on the big shot (pardon the blurry pictures...something was up with my camera.)
Lay your fabric sandwich on the shape you are wanting.
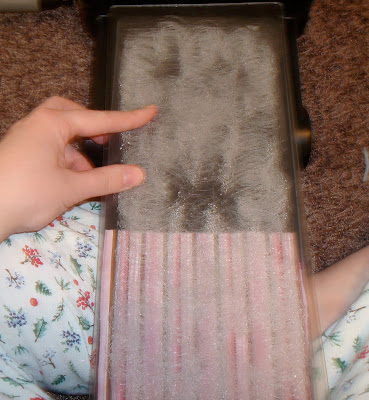
Lay the plastic piece over the top (I know Christmas is over, but I love those flannel pajamas, haha.)
Then add a strip of cardstock over the top of your plastic sandwich. This just gives the big shot that much more pressure so that it cuts through all the layers a little bit cleaner.
And there you go....
Now layer your flowers all cute...

(My assignment was to make 30 of them...)
Then take a ribbon and tie a knot in the middle of it to be the "bud" in the center of the flower. Then thread your flowers through. (I had to cut holes in the centers of the two larger layers since they don't come pre-cut with a hole like the small flower.)
Voila. Adorable flowers that could be headbands, tied on a purse, pinned to a shirt or hat, or added to a table runner for your sister's wedding like so:
and so on and so forth.
And if you want them to not fray, you could stitch around them with your sewing machine to help them stay down nice and tight.
Tell me that isn't SOoooo cool?!!??! There will be MANY big shot projects featured on here in the future, so keep your eyes peeled.
The first step is to cut your fabric out into squares and glue them together, sandwiching the batting in the middle.
And if you want them to not fray, you could stitch around them with your sewing machine to help them stay down nice and tight.
Subscribe to:
Posts (Atom)