Showing posts with label mod-podge. Show all posts

Thursday, February 18, 2010

Adorable Baby Quilts

I'm a little obsessed with this adorable baby quilt from V&Co.
 PS: It KILLS me that her post is called, "I made a couple of quilts." Like she's saying, "I went out and checked the mail." Modest, much?

I'm generally quite thrifty (and deep down, sorta cheap), but quality custom-made quilts are one thing I'd pay a lot for...and have before.  There is just something so wonderful about a bright, cozy, heavy quilt.
 

Thursday, January 7, 2010

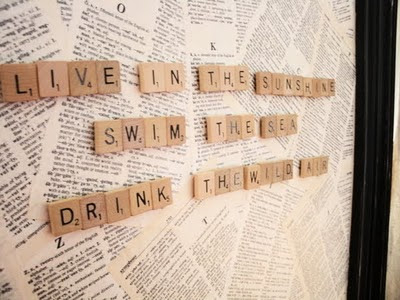
Magnet Board and Scrabble Letters

Ummm...can I just say, "Cute!"?

Something about Scrabble letters lately is so fun. :) I might have to check out the DI and see if anyone was dumb awesome enough to donate a game so I can make this magnet board!

Thanks Kari at U-Create for featuring this great idea from The Twice Remembered. :)

Monday, December 21, 2009

Homemade Coasters

Let's talk about coasters. :)
You might remember from a couple of months ago when I posted about these super-cute coasters from Becky Higgins.
Well, my sister is moving into a new apartment next month, and she bought new furniture for her living room. Brand spanking new furniture? Talk about needing coasters! :) So I made some for her for Christmas.

I bought the wood squares at Hobby Lobby. I think they were 3/$1.00 if my memory serves. I also bought chocolate brown toll paint. First thing's first, I painted the edges and the under-side.
Then I cut squares of scrapbook paper to the right size.
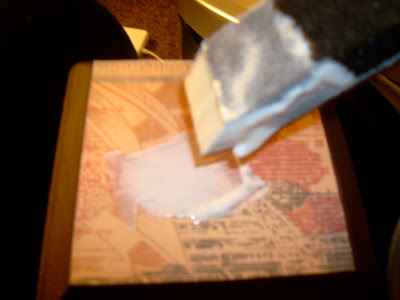
Next, I mod-podged them onto the wood squares. **NOTE: I used the thicker kind of scrapbook paper (more of a card-stock weight) and it kept soaking the mod podge up and taking forever to dry, because it was kind of spongey....so I would recommend NOT using the more porous card-stock paper when modpodging. Stick to the normal paper-weight scrapbook paper.**I think I added about 4 layers of mod podge over about a 6-day period of time. {Like I said, it was taking FOREVER to dry!} Once the mod podge had dried completely on all sides, I shellacked the heck out of them. The reason I shellacked is because mod podge has the tendency to stay a little tacky. For most projects, that's not a big deal, but I wanted my sister to be able to stack these coasters on top of one another, and I didn't want them to get stuck together and then peel when she tried to pull them apart.

The shallac helped with the tackiness--they are still a BIT sticky, but hopefully it won't harm them.
If you are still looking for a quick gift idea before Christmas, these might be something to try! If you don't use the uber-thick paper, you could have this project done and dried within a couple of days.

Wednesday, December 2, 2009

Faux Gumball Machines

Aren't these adorable? Be Different, Act Normal was featuring them over at her blog.
See Jane Blog is the creator of these oh-so-cute faux-gumball machines! What an adorable neighbor gift, stocking stuffer, hostess gift...well, you get the idea. :)

For some more holiday inspiration, check out these other holiday posts on Craft Rookie:


Wednesday, October 28, 2009

Stocking Stuffers

I don't know where you live, but where I am, we've been greeted the past couple of days with snow. Snow and ice. And freezing, ridiculous October temperatures. I'm not going to lie, I've sang a couple of Christmas songs. I love Christmas...I HATE cold. So in the spirit of the weather, and since the time to do Christmas projects is NOW, here are a few ideas for stocking stuffers and easy gifts for your kids, friends, or relatives.

(All of these ideas are from Make It and Love It tutorials).

Easy magnets
Bow Holder
Camera Strap

Eye Spy Bag (perfect for church!)
Sewing Machine Cover (for all your crafty friends and relatives!)
Decorative tissue box holder
Hooded towel with ears. You could also do this with a duck bill or frog eyes or something. :)

Friday, September 25, 2009

Homemade Christmas Ornaments on a Budget

Last year we had a little mini-tree because we didn't have room in our small apartment for a big one.

But this year, we have more room, so we are planning on getting a full-size tree. The only problem? We only have little mini-ornaments...and I have a feeling they'd look pretty wierd on a big one. :) So it was time to start making ornaments for our full-size tree.

Since we don't have a lot of storage space (or a lot of money) we didn't want to invest in the bulbs that take up so much room to store (and cost a lot.) So I went to Hobby Lobby and found these great wooden Christmas shapes. They were 4/1.00! I can handle that. :)
Then I bought some clearance patterned paper (I think they were trying to get rid of the leftover stuff from last year...but heck, it's all red and green, so it works for me. ;)
I also bought some red and green ribbon to help decorate them.
So first thing's first, I cut out a little bit of paper big enough to cover the first shape. Then I put some mod-podge on the shape, layed the paper on it, and smoothed out the bubbles. (For more detailed instructions on mod-podging, click HERE.)After the mod-podge under the paper has dried, put a layer of mod-podge over the top of it to give it a shiny, glossy, hard cover. Let it dry, then coat it a couple more times until it looks how you want it to.After the mod-podge had dried everywhere, I took a foam brush, and sponged the edges of the shapes with some silver toll paint. I let that dry, and then added embellishments like buttons, ribbons, etc. to each shape.Next I sprayed a layer of glitter over all of them. :) I think it will look cool when the lights on the tree catch the glitter and make the ornaments look sparkly. Tu-duh!Candy CaneBulbTreeStockingPresentReindeerGingerbread ManThese would also make great tags for larger presents. :) Oh, and in case you were wondering, I am going to drill a little hole in the top of each of these and put a hook or ribbon through them so they can hang on the tree. :)

"Can't Get Enough..."

Monday, September 14, 2009

Mod-Podge Season Signs

You may remember a few months ago when I made a sign that said "Summer" to hang on my wall for the summertime. Anyway, summer is over, so it was time to make a new "Fall" sign. I also made "Winter" while I was at it. :) So if you want to make your own cute season sign (or cute letters that say your kid's names for the bedroom or something...) just read how:

First of all, I like to buy a base to put the letters on, since I change it out for each season.

So first thing's first: You need the letters you plan to use. In this case F-A-L-L.Then choose the patterned paper you want:
I painted my base first thing so it could start drying while I worked on the letters. I just chose black, because I was at the craft store and wanted to get the paint...but didn't know what paper I was going to use at the time. Ideally, you would find your paper choice FIRST so you could match the paint to it (I could've done maroon, or chocolate brown or something if I'd known what color paper I was planning on....) But black worked fine.... I also added a layer of mod-podge once the black paint was dry to give it more of a shiny look to match the mod-podged letters.
To do the letters, my method is to flip the paper and the letter upside-down and trace around the letter as closely as you can. If you have a method that works better for you, by all means, go for it. :)Then cut it out and lay it on top and make sure everything looks right. Trim if necessary. :)
Do this with each letter.Next, you are going to want to paint the sides of your letters.Then lay your patterned paper on top of the letter, and mod-podge away! If you have never mod-podged before, the key is to just keep running your fingers over it so you don't get bubbles.Do this to all of your letters and let them dry...making sure to smooth out any bubbles.
After I had mod-podged them all and they had dried, the next thing I did was take some silvery paint and sponge it around the edges to give it more of a finished look.
Then I hot-glued the letters onto my sign.I followed the same exact method to make my "Winter" sign.
The only difference between my Fall sign and my Winter sign is that I sprayed a layer of glitter on my Winter sign to make it look more shimmery like snow and ice.So go get your letters at your nearest craft store and start mod-podging!!!!