
Hazel is such a drooly little thing that I decided it was high time to make her some bibdanas. I asked for a KAM button fastener tool for Christmas so I could knock out a few of these, and it's so much fun. My favorite part is adding the snap at the end. :)
So if you'd like to make your own, here's a simple little tutorial to get you going.
What you will need:
-fabric
-pins
-a piece of cardstock
-a rotary cutter and mat, or just scissors will do
-coordinating thread
-a sewing machine
-a button press and buttons. You can find the one I like here:
Okay, so first thing's first. Make your pattern.
Start with a normal 8 1/2x11 piece of cardstock. Normal paper is okay too, but if you are making several bibs, you want a pattern that won't rip easy and will be kind of stiff.

Fold your cardstock in half.

Lay it flat and cut off one of the corners at however sharp of an angle you think you want your bib to be. I put mine by the measuring corner of my mat so you can see how far down I cut, but this is really preference and doesn't have to be exact. Save the corners you cut off.

After you've got the bottom how you want it, cut off about an inch from the top as well.

Take the angled pieces you've cut...

and invert them onto your now-open piece of cardstock. They are the ends of your bibdana pattern.


Tape them back onto your pattern.

Now that your pattern is made, get out your fabric and fold it in half.

Using a rotary cutter, trim off the excess fabric around your pattern.

Do this to the reverse side of fabric as well. I like to do two coordinating fabrics so the bib is reversible, but you could also do the same fabric for both sides or even put terrycloth or minky on the backside.

Now that you have two pieces, you are ready to roll.

Put the fabric face-to-face, so the bright sides are facing each other.

Pin it the pieces together.

You should see the back sides of both pieces of fabric when you've pinned them together.

Now zig-zag stitch all the way around the bibdana, leaving enough room at the end to turn the bib inside-out.

Turn it inside-out, making sure to use something to poke your corners out nice and pointy.

Now straight-stitch all the way around the bib, making sure to incorporate in the portion that you hadn't zig-zagged before (where you flipped it inside out).

When you're done straight-stitching, take your corners and put them together where you think you'd like them to snap.

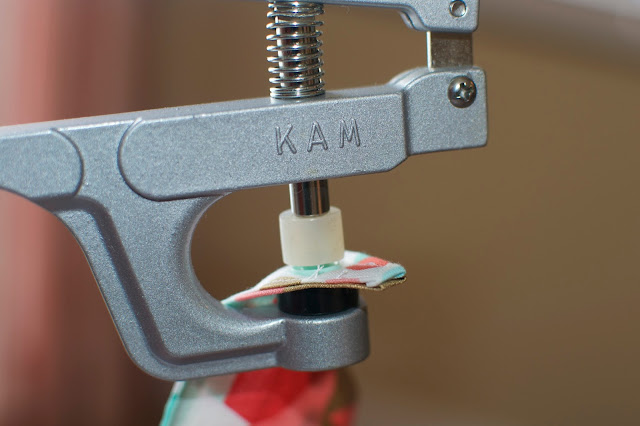
Using the auger that comes with your KAM kit, poke a hole through both pieces of fabric.

Then choose your buttons, put them in your button fastener, pinch the buttons on, and....
Voila! Buttons. Reversible bib. You are done.


Now make a bunch of them in every color your baby could possibly need.

*To wash, just put in the laundry with other burp cloths and bibs. Use a pre-treating spray if there is spit up. I haven't tried running mine through the dryer, I've been just stretching them flat and laying them over a drying rack so they dry nice...but you could probably put them through the dryer fine as well if you wanted.*
No comments:
Post a Comment