
Since I'm on the cusp of needing to create a car seat cover again, I revisited my tutorial from when I originally made Chloe's cover, to refresh my memory. I thought maybe this might come in handy to some of you out there that haven't been following the good ol' blog long enough to see this, so here you go:

*Originally published in 2011*


 I made this carseat cover for Baby Girl's new carseat. I didn't use a tutorial to make it, but I've read a lot of different ones in the past. Make It and Love It is where I'm pretty sure I saw it for the first time.
You can use Make It and Love It's tutorial, or if you prefer my instructions, since I did mine a little differently, here goes. (Or use a combination of the two since we have totally different styles of explaining things, so you might get something out of hers you can't get from mine, or vice-versa):
1. Buy 1 1/4 yards of each of the two fabrics you want to use. That was the amount that worked for my Chicco Keyfit 30. If you have a different style of carseat, you may just want to take a measuring tape and get a feel for how much fabric you think you'll need. I really don't think you'd need much more than that though, with any carseat.
 2. You will also need either sew-on velcro for the handles (that's what I did) or else you can buy thick grosgrain ribbon (like on the Make It and Love It tutorial.)
3. Cut your fabric pieces to the length you want it exactly. I trimmed off an edge of both fabrics so I'd have some leftover for the handles. (I'm talking like maybe three or so inches down one side of each of them.) Your fabric should basically be cut into a square (all stitched up mine measured approximately 40x40 inches), or if you want you can make it a tad more oblong (since carseats are kind of oblong.)
4. Lay the fabric pieces back-to-back and pin them. I used flannel since my baby is going to be here in the frozen tundra of Wisconsin for her early months of life. If it's summertime or you live somewhere warm you can do a lighter fabric. Make It and Love It did fleece, but I thought it just looked too suffocating, so just make your own decision on what will work best for you.
5. After the fabric is all pinned up, just sew around the edges. I'm kind of zig-zag happy because I really want my projects to stay together nicely, so I did a zig-zag stitch first, then a straight stitch. Remember to leave enough of the edge unstitched that you can flip the fabric inside out.
6. Once you've flipped it inside out, sew in a straight line around the entire thing (this includes stitching up the hole you left to inside-out it.) I actually did two lines around the edge, just to give it a more finished look (and just in case something didn't hold on the first line, particularly since that's your only chance to stitch up the hole you left on one edge.)
 7. Once your cover is all stitched up, you are almost done. But now comes kind of the tedious part. You need to make the handles. It's pretty simple, it just takes some time. You just need to cut out strips of the fabric to the length and thickness you want them to be. Then put them back-to-back, pin them, and stitch them, just like you did the carseat cover.
8. Then sew the velcro on. (You'll sew one side of the velcro to the inside of the handle, and one side of the velcro to the outside of the handle. Don't worry...it'll make sense once you go to pin it on.) I went zig-zag crazy here because I wanted the velcro to be nice and tight. I tried to keep it looking as tidy as possible, while still zig-zagging the crap out of it. I think it looks fine (and that velcro isn't going anywhere!)


 9. Once your handles are all made (you need two) you need to figure out where you want your handles on your cover. This took some pinning and re-pinning for me. I wanted more of the cover hanging in the front of the carseat than over the back (where there is already a visor for protection), so I couldn't just pin the handles smack-dab in the middle. This isn't to say you couldn't...I just didn't want them there. So once I figured out where I wanted them, I pinned them onto the cover and then gave it a try on my carseat. It took a couple of tries to get them sitting just where I wanted them to hook on the handle, but eventually I felt good about where they were at and sewed them on. (As you'll notice in the picture, I sewed them opposite directions from each other...oops!)
 ***Keep in mind here that you don't want the cover attached so tightly to the handle of your carseat that you can't get your hand around the handle. Let it sag just a little in between the cover handles so you have a spot for your hand.***
 10. Same thing as with sewing on the velcro: zig zag it onto the cover like crazy. Especially if you do flannel or fleece, the cover is quite bulky and heavy in comparison to your skinny little fabric handles (or ribbon if you choose to go that route) so make sure you stitch them on really well to your cover. At first I just did one thick line (back and forth, back and forth) to sew them on, but it was making the cover still hang with a lot of weight pulling on that one stitch, so I ended up stitching the handles onto the cover in multiple places to give it more support and keep the cover from ripping away from the handles. This is what it looks like from the inside of the cover (where no one will see, by the way, so don't worry about beauty--focus on securing it tightly and sewing it on in spots to help it not rip with the weight of the cover.)
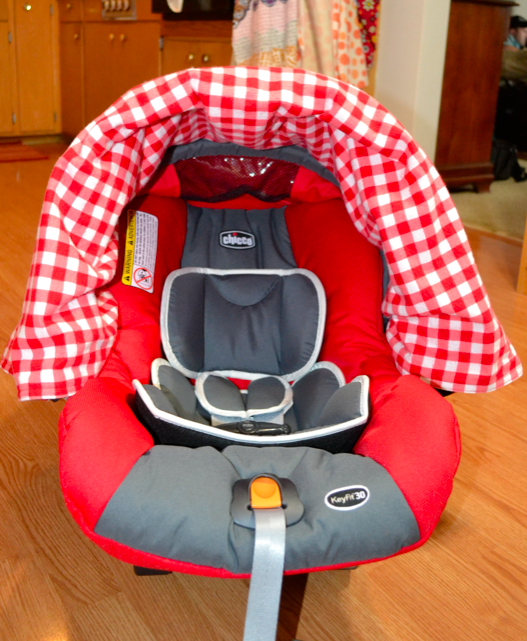
 And there you have it. Hook it onto your carseat, and you have a cozy little cave all ready for your little one! When you head into a grocery store or wherever, 0r when you get the car nice and warm, just flip the cover up over the handle of the carseat so they don't get too hot and so they have lots of air!
PS: I've heard you are actually supposed to not drive with the handle up, so just make sure you are following the safety regulations suggested (this may mean taking the cover off when you drive or at least folding the handle down.)
Like I said before, there are a million ways to go about this. This is just how I went about it, and it's not right or wrong. The way you make your cover will vary based on the weight of your fabric, how strong your velcro is, what kind of thread you are using, and whether or not you make handles like me or use grosgrain ribbon like on Make It and Love It. Just don't stress too much over it. Your baby won't care what it looks like, and the whole point is just to keep them warm, not to win a sewing award. :)Good luck, and as always, you are free to email me with your questions.
Another PS: I've read that some people just buy a receiving blanket or a flannel or fleece blanket of some kind and sew some handles (or ribbon handles) onto it. This would work just fine, since essentially the cover is just a flannel blanket. If you aren't really comfortable with the whole process of stitching the blanket, then that really is a great alternative. :) Happy Sewing!
No comments:
Post a Comment