


The instructions at Martha Stewart tell you to use an old pillowcase to make your bag. Well, we're newlyweds with two sets of sheets to our name, so I'm not about to go cutting up a pillowcase...and since I didn't have time to run to the D.I. I decided to make my own "pillowcase."
Using fabric I had on hand, I traced the shape of a pillowcase I owned, and cut and measured the fabric to size.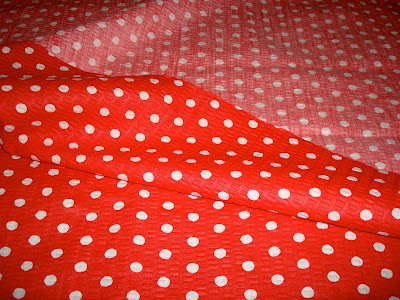 Then I sewed it together as if I were making a pillowcase for myself. Pretty straightforward, right? 1) Make a rectangle shape, 2) make an identical rectangle shape. 3) Put them back-to-back 4) stitch up three sides, leaving one end (where the pillow would go in) open.
 There you have your pillowcase. If you need more explanation on this portion, email me.
The hardest part of this (besides the fact that I was pretty much making it up as I went along) was that I wanted to do a lining on the inside of the bag. I have never attempted a lining for anything, and I have never made any sort of bag, so this was kind of a trial and error thing for me. Also, if you look at the Martha Stewart version, she cuts the pillowcase diagonally and re-stitches it together. I don't do that here, so if you want the criss-cross look, you should pay special attention to her tutorial.
I chose my lining fabric, folded it in half, and stitched up the one side so I had kind of a cylindrical shape (like a skirt--sides sewed up, top and bottom open).
 Next, I turned my pillowcase inside-out and turned my lining inside-out. Then I pinned the lining to the bottom portion of the pillowcase (the closed end.) As I pinned it, I puckered it a little bit.
  I was worried if I pulled it too tightly, that when I put stuff into my bag it would weigh on the seams too heavily and pull it apart. In hindsight, I should've also cut my lining a few inches longer than the pillowcase bottom so that when I puckered it I still had plenty of room. As you can see from the picture below, puckering my fabric meant that it didn't quite go to the edges of the pillowcase portion.
 After I had the lining pinned where I wanted it, I sewed it to the bottom of the pillowcase.
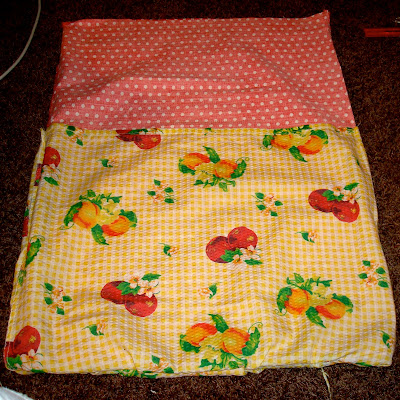
 Here is the lining sewed on. (The bag is inside-out.) Now if you can imagine, when I flip the entire pillowcase right-side out, the yellow fruit lining will be on the inside of the bag....but in order for it to stay in place, you need to stitch it to the pillowcase on the sides and/or the top. Because I didn't want a big old stitch line all the way around the top of the lining, I decided to just backstitch a bunch of times in specific areas on the pillowcase. (Clear as mud, right?)
 If you look closely, you can kind of see what I mean in this next picture. Notice the thick area of white thread? I did this in four places on the bag in inconspicuous spots so it wouldn't be too noticeable, but it would hold the lining up on the inside of the bag.
 The next thing you need to do, is cut a V-shape out of the top of the pillowcase for your handles/ties. Then hem up the "V" so it has a clean and sturdy edge that won't fray.
 Here's a little bit of a close-up. Notice the back-stitch areas that are holding the lining up, too.
 So here's what the completed bag looks like inside-out. Doesn't that lining look cute? :)
 The last thing you need to do is tie a secure not in the top of your "V" and then away you go!
 So what do you think? Like I said, I think this tutorial is about as clear as mud...so if you are interested in making this bag and you can't figure out how to do it between my tutorial and Martha Stewart's instructions, feel free to email me and I'll respond really quickly. :)
PS: This project took me about 2 hours from start to finish. But that included creating my own "pillowcase," so if you start with a pillowcase already made, you should be able to complete the project even quicker.
Happy Sewing!
Using fabric I had on hand, I traced the shape of a pillowcase I owned, and cut and measured the fabric to size.
 Then I sewed it together as if I were making a pillowcase for myself. Pretty straightforward, right? 1) Make a rectangle shape, 2) make an identical rectangle shape. 3) Put them back-to-back 4) stitch up three sides, leaving one end (where the pillow would go in) open.
 There you have your pillowcase. If you need more explanation on this portion, email me.
The hardest part of this (besides the fact that I was pretty much making it up as I went along) was that I wanted to do a lining on the inside of the bag. I have never attempted a lining for anything, and I have never made any sort of bag, so this was kind of a trial and error thing for me. Also, if you look at the Martha Stewart version, she cuts the pillowcase diagonally and re-stitches it together. I don't do that here, so if you want the criss-cross look, you should pay special attention to her tutorial.
I chose my lining fabric, folded it in half, and stitched up the one side so I had kind of a cylindrical shape (like a skirt--sides sewed up, top and bottom open).
 Next, I turned my pillowcase inside-out and turned my lining inside-out. Then I pinned the lining to the bottom portion of the pillowcase (the closed end.) As I pinned it, I puckered it a little bit.
  I was worried if I pulled it too tightly, that when I put stuff into my bag it would weigh on the seams too heavily and pull it apart. In hindsight, I should've also cut my lining a few inches longer than the pillowcase bottom so that when I puckered it I still had plenty of room. As you can see from the picture below, puckering my fabric meant that it didn't quite go to the edges of the pillowcase portion.
 After I had the lining pinned where I wanted it, I sewed it to the bottom of the pillowcase.
 Here is the lining sewed on. (The bag is inside-out.) Now if you can imagine, when I flip the entire pillowcase right-side out, the yellow fruit lining will be on the inside of the bag....but in order for it to stay in place, you need to stitch it to the pillowcase on the sides and/or the top. Because I didn't want a big old stitch line all the way around the top of the lining, I decided to just backstitch a bunch of times in specific areas on the pillowcase. (Clear as mud, right?)
 If you look closely, you can kind of see what I mean in this next picture. Notice the thick area of white thread? I did this in four places on the bag in inconspicuous spots so it wouldn't be too noticeable, but it would hold the lining up on the inside of the bag.
 The next thing you need to do, is cut a V-shape out of the top of the pillowcase for your handles/ties. Then hem up the "V" so it has a clean and sturdy edge that won't fray.
 Here's a little bit of a close-up. Notice the back-stitch areas that are holding the lining up, too.
 So here's what the completed bag looks like inside-out. Doesn't that lining look cute? :)
 The last thing you need to do is tie a secure not in the top of your "V" and then away you go!
 So what do you think? Like I said, I think this tutorial is about as clear as mud...so if you are interested in making this bag and you can't figure out how to do it between my tutorial and Martha Stewart's instructions, feel free to email me and I'll respond really quickly. :)
PS: This project took me about 2 hours from start to finish. But that included creating my own "pillowcase," so if you start with a pillowcase already made, you should be able to complete the project even quicker.
Happy Sewing!
5 comments:
Thank you for doing this! I saw this on MS and wanted to try it, but I didn't want the criss-cross, plus you give a few more detailed instructions. I am so going to try this!
Too funny! I did the same thing! Well, I just followed MS's directions, but I'm planning on changing it quite a bit so that it is more durable.
And the 29 should work just fine for us. If Stewart has to work, he'll be home before dinner time. Just let me know if that day still works for you guys!
Very very cute! I always shy away from lining b/c it always looks too hard. lol I just might try it. :)
This is so cute and I know what you mean about not having enough pillowcases to spare any...we don't either! I'm definietly going to have to add this to my list of projects!
Hello! I add a link to this page. Take a look here http://pazzeperitutorial.blogspot.it/2014/03/come-fare-borse-riciclando-le-federe.html
I hope you appreciate this!
Post a Comment