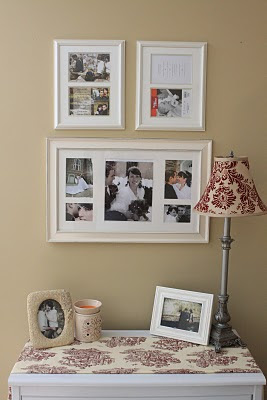
"Designing with portraits can be a very inexpensive and creative way to add your unique style to a room. The more creative you get, the better! One of my favorite ways to add that unique style is to "create" your own frames. This can be by either making them from start to finish or going to a thrift store and buying frames to spray paint colors of your choosing. Don't be afraid to use mis-matched frames in color and style! One large portrait accentuated with sconces is also a quick and easy way to create a focal point for any room."
Kristen at www.atmosphere-id.com or e-mail kristenh@atmosphere-id.com.
She is right! I love seeing portraits displayed in my home, because not only are they a quick attention grabber, but they bring personality to my home and make my decorations that much more personal. Here are a few hanging around my house:
 This is above my desk. The combination of black and brown frames brings a lot of interest to the space.
 I couldn't find frames that I liked to hang here with portraits I had just printed. I searched EVERYWHERE for something in my budget. Then I remembered that I had these frame sizes, just in colors I didn't like so I spray painted them white to match the rest of the decor. A grouping of a 16x20 and 2 11x14 will fill a wall nicely.
 Lol, I realize I haven't filled one frame yet. This dresser from IKEA is a little low, so I attempted to add height by filling the space with portraits. The two top frames were clearance at Walmart, the big one clearance at Ross. I felt like I won the lottery. I typically am a fan of collage frames as well, but find they can be busy. Find frames that only allow larger sizes with 2-6 openings, and it won't look like you're portraits exploded.
 This is in my family room. Again, trying to adjust for height I filled the space with a grouping of 2 11x14's (one mounted) and 2 8x10's.
 This is the focal point of the room, as Kristen suggested. A 20x30 that I printed at Sam's and a frame I bought at Walmart- total cost of the presentation was around $20 at the time I believe. Which sure beats printing them custom, even if you do sacrifice a little quality. The sconces added the right amount of width and the lettering added a fun element. Sconces and Lettering were found at Ross and Hobby Lobby.
I love pictures! I love taking them of others, and I love having them for myself. There is nothing greater than to see a wonderful family memory from a session preserved in wall hanging.
Do:
Have fun! Experiment with colors and arrangements
Fill the space.
Be creative. Prints can be framed, mod podged onto a wood backing or canvas, or mounted professionally.
Don't:
Over crowd. Using too many frames, especially if they are small will overwhelm the viewer.
Only use an 8x10 inch frame on a 10 ft wall. I have seen this done, and it makes me smile. Fill the space.
Stress. :)
Thanks for reading. Head on over to http://ciocophotography.com to see my latest fun sessions and the awesome people I get to associate with! Have questions? Send them over: ciocophotography@gmail.com. Have a great week!
I'll leave you with some more arrangement ideas:


No comments:
Post a Comment